
Open the management page
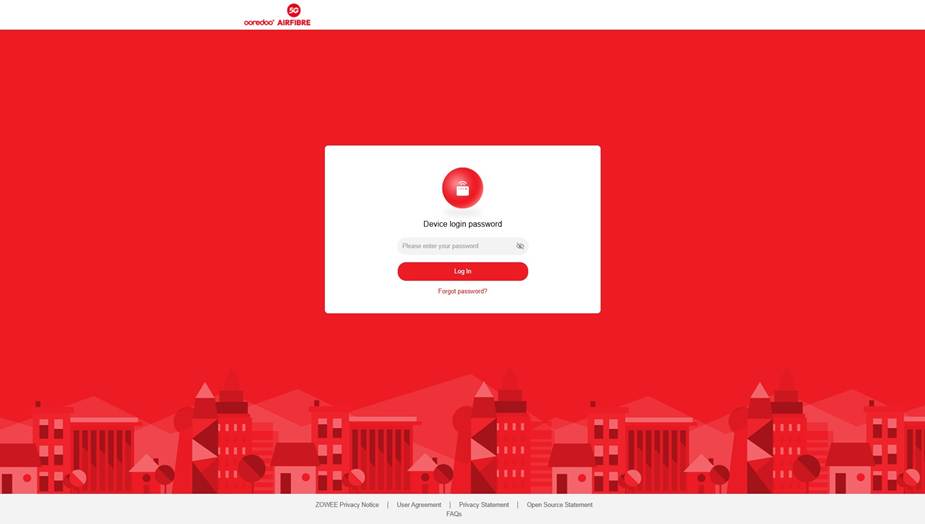
In your browser, go to 192.168.8.1 and enter your device login password to sign in.
Go to Tools → Parental Control
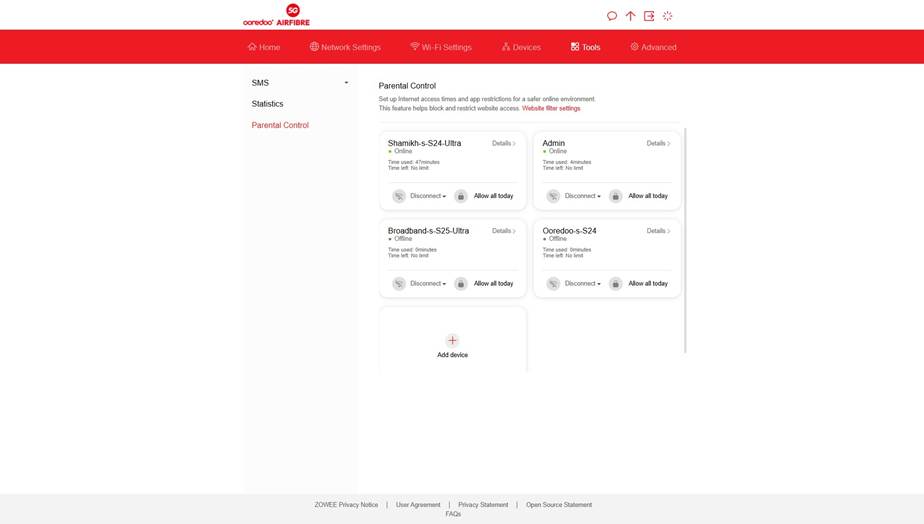
From the top menu, select Tools > Parental Control.
You’ll see a card for each managed device, showing its status and usage time, along with an Add Device option.
Add a device to the policy
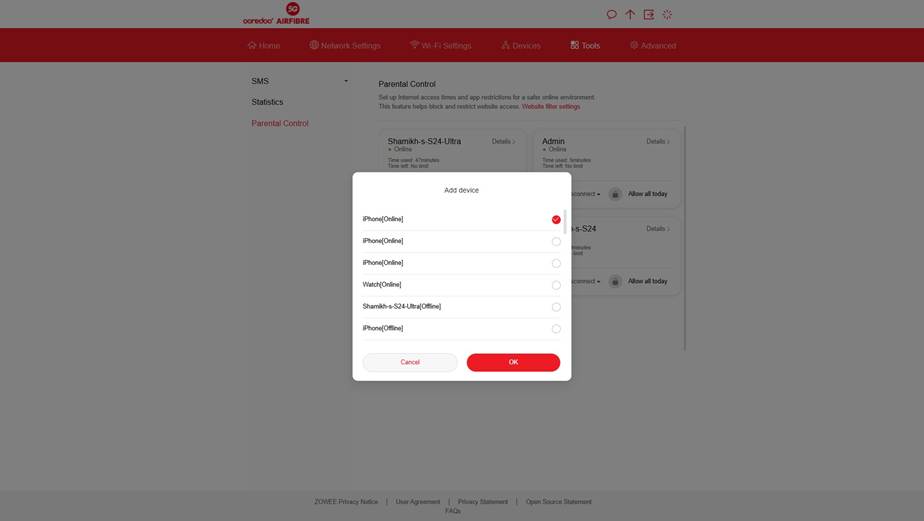
· Tap "Add device" to see every device connected to your network, online or offline.
· Choose which one should be subject to Parental Control.
Customize settings for a specific device
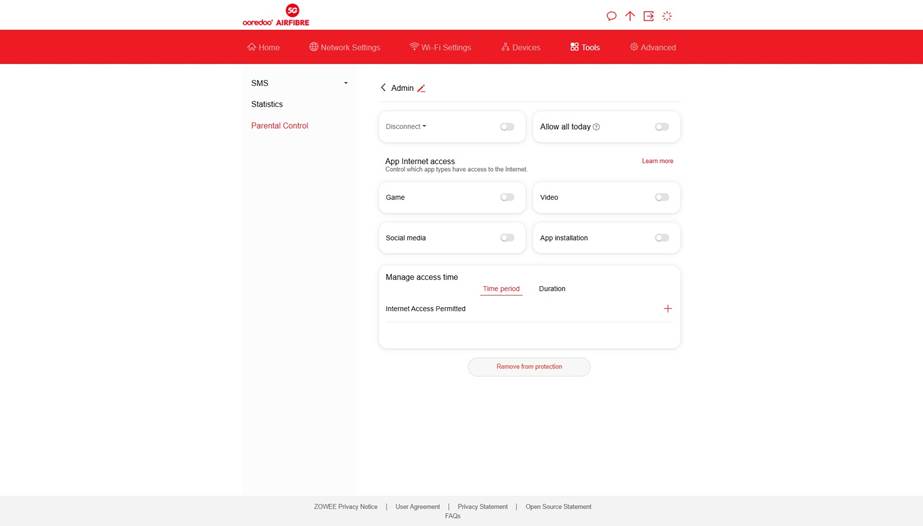
· Tap a device to open its settings panel.
· From here, you can:
· All controls are available in one place.
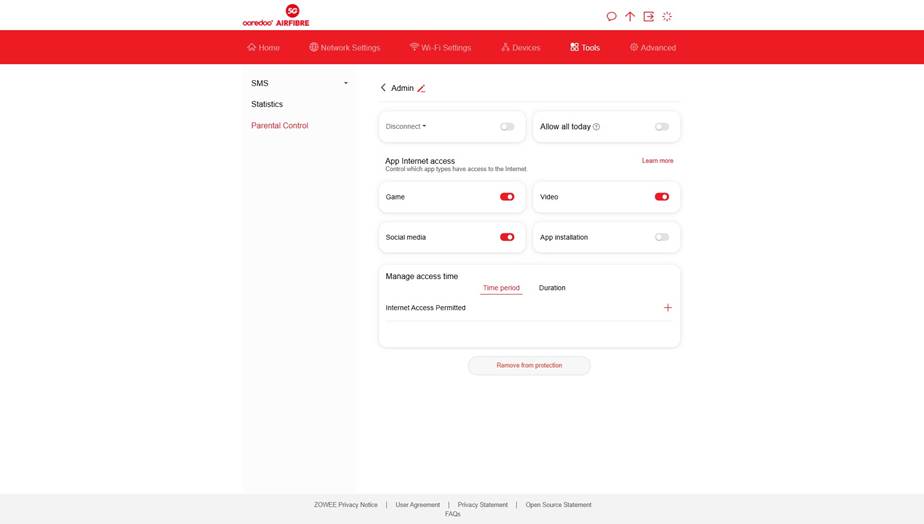
Turn on category toggles
· Under "App Internet access," switch on Game, Video, Social media, and App installation as needed.
· This is an all-or-nothing switch per category — unlike the app, there's no option here to pick specific apps to allow or block.
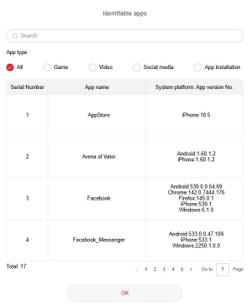
View the identifiable appslist (reference only)
· Tap "Learn more" to see which apps and platforms fall undereach category (for example, AppStore, Arena of Valor, and Facebook under thedefault view
· This list is informational — it shows what a category covers, not a set of individual toggles you can switch on or off.
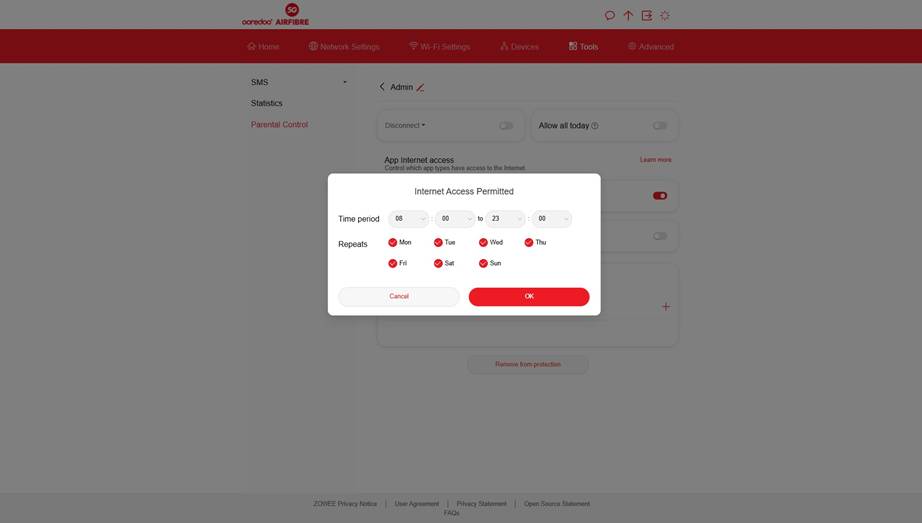
Option 1: Set a time period
· Under "Manage access time," open the "Time period" tab and tap "+" to add a rule.
· Set a start and end time.
· Choose which days it repeats on.
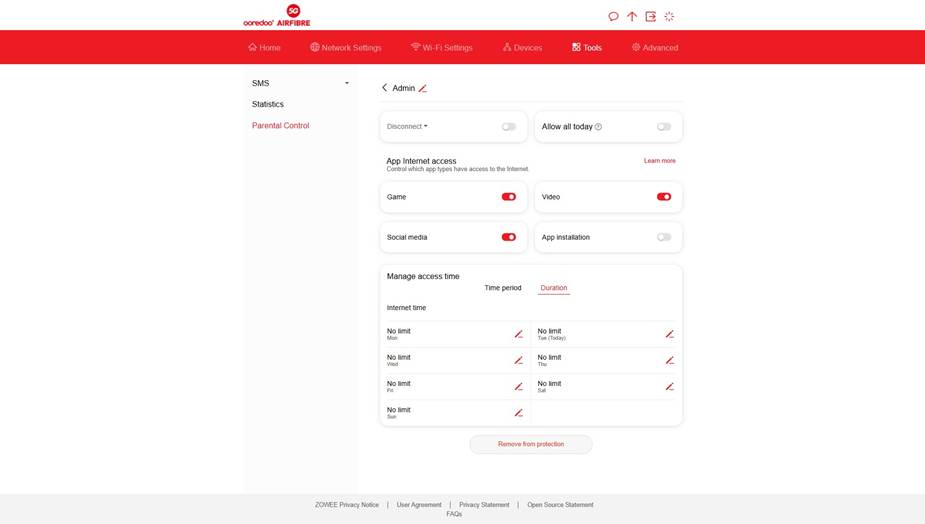
Option 2: Set a daily duration limit
· Switch to the "Duration" tab to cap total internet use per day, set individually for each day of the week.
· Tap the pencil icon next to a day to edit its limit.
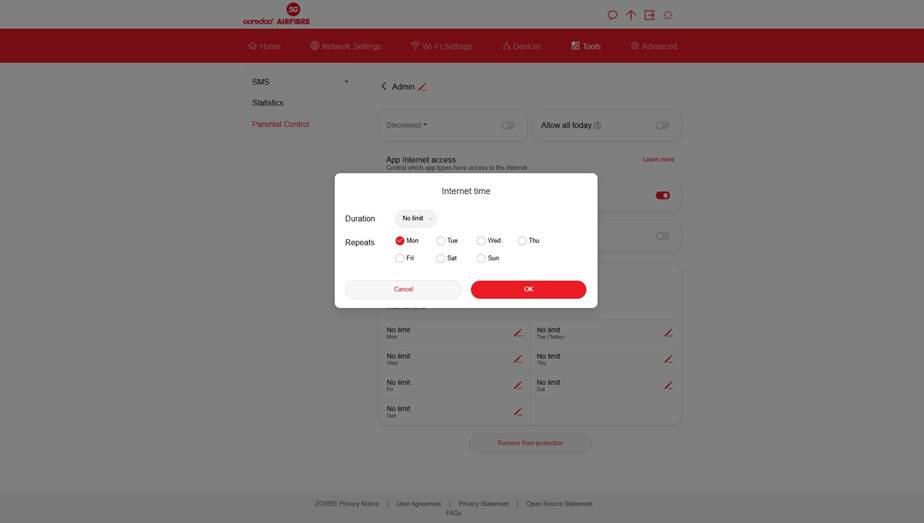
Set the duration and which days it applies to
· Choose a duration from the drop-down (or "No limit").
· Select which day or days it should apply to.
· Tap "OK."
Disconnect, allow all today, or stop managing a device
· At the top of a device's panel, use "Disconnect" to cut it off immediately, or "Allow all today" to lift restrictions for the rest of the day — the web equivalent of the app's Quick controls.
· Tap "Remove from protection" at the bottom if you no longer want Parental Control applied to that device.
· The web portal also has its own domainfilter, separate from the app's.
· It lives under Advanced settings rather thanParental Control.
· It lets you block sites for specific devicesor the whole network.
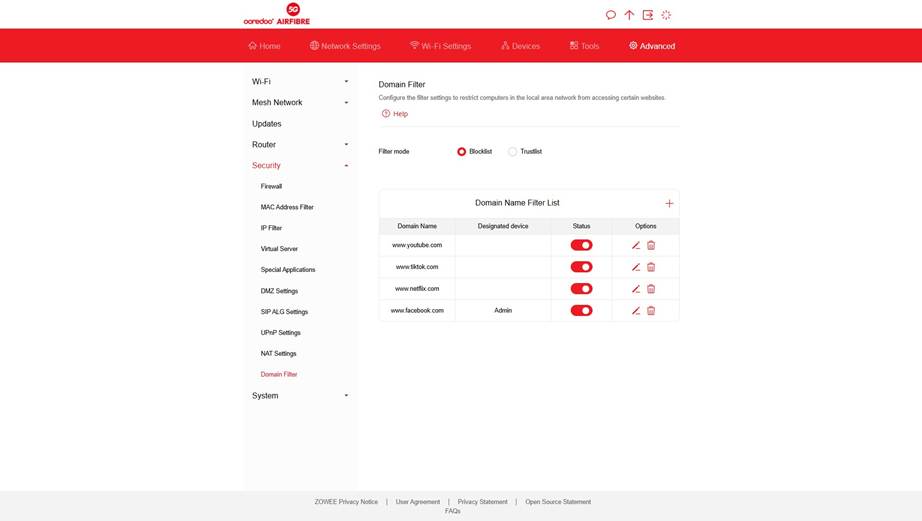
Open Advanced → Security → Domain Filter
· From the top menu, go to "Advanced."
· Expand "Security" in the side menu and select "Domain Filter."
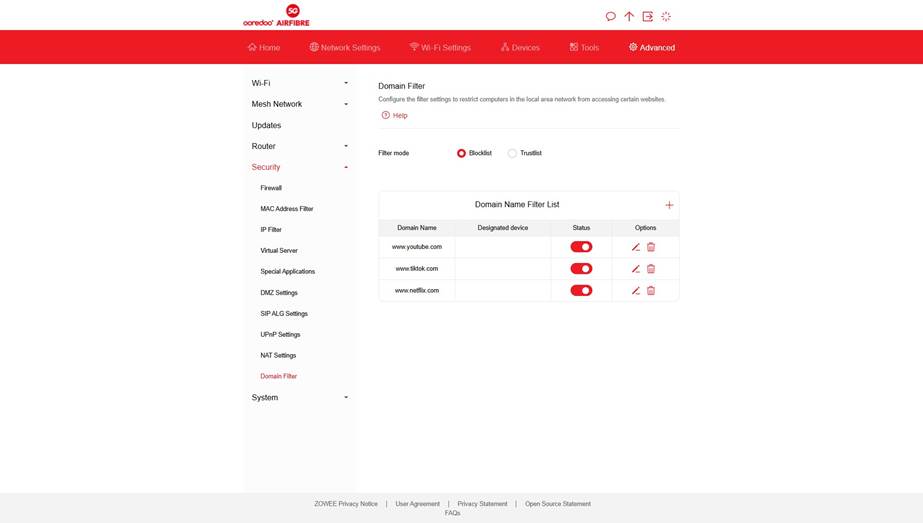
· Choose "Blocklist" to block specific sites (or "Trustlist" to allow only specific sites).
· Tap "+" to add one.
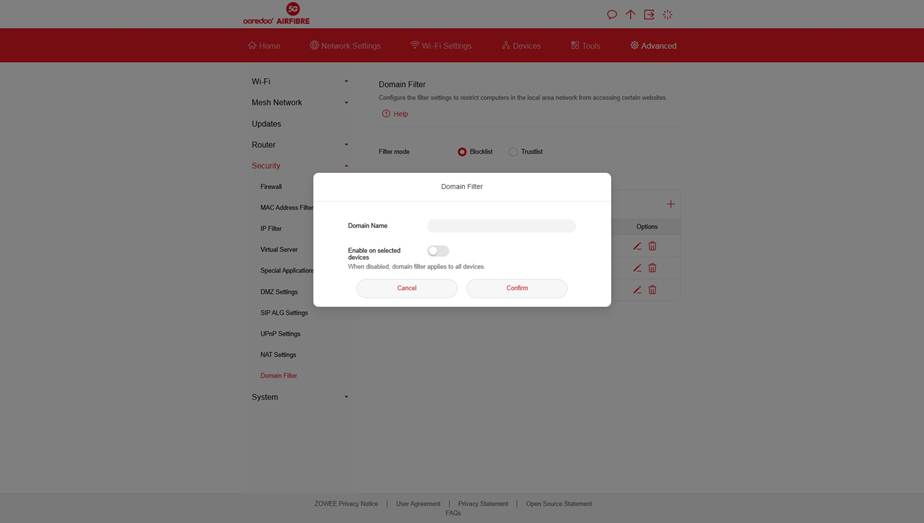
Enter the domain name
Type in the website you want to block. Leave “Enable on selecteddevices” off to block it for every device on the network.
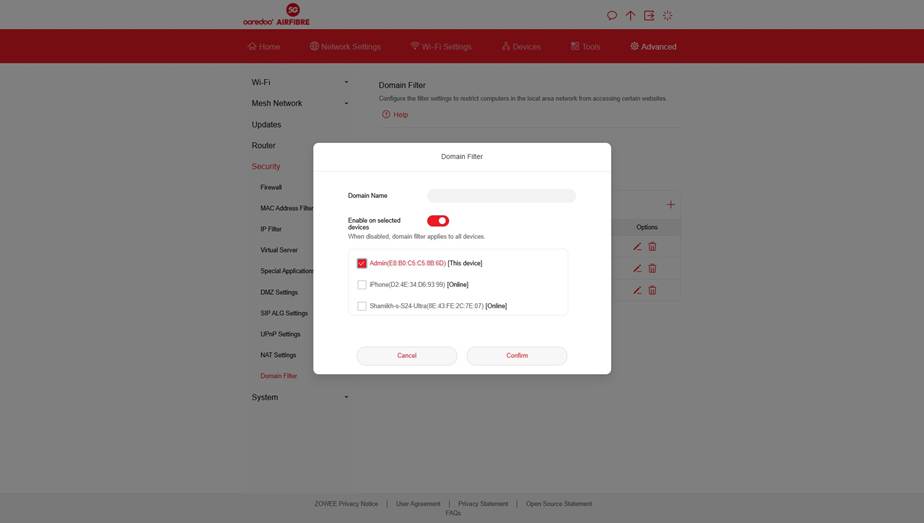
Or restrict it to specific devices
Turn on “Enable on selected devices” to reveal the device list, then check which devices the block should apply to before tapping “Confirm.”
Review your filter list
Every domain you've added appears in the Domain Name Filter List, along with its designated device (if you set one), a status toggle, and edit/delete options.
GOOD TO KNOW
· Changes to Parental Controls apply only to the selected device,repeat the steps for each device you want to manage.
· “No limits” and “Disconnect”are instant overrides — your category restrictions and schedule stay savedunderneath and apply again once the override ends.
· The app and the web portalcontrol the same Parental Control settings. Use whichever is more convenient;changes made in one show up in the other. The one exception is per-app blockingwithin a category, which is only available in the app.